
As we all know, the Easter Egg hunt only takes mere minutes to be done and dusted with! Then there's big sugar highs and multiple public holidays to fill with fun remaining.
So it's easy to see why we thought it would be a good idea to pull together easy (and fun!) Easter craft ideas for Castle & Cubby families!
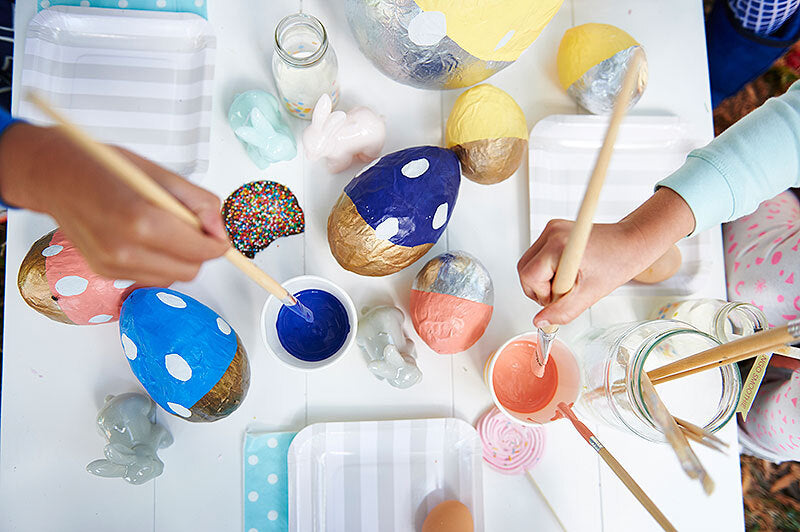
Paper Mache Eggs - Ingredient List
-
Balloons (hot tip! use water balloons to achieve a perfect egg shape)
-
Bowl and cups
-
String & pegs
-
Newspaper or tissue paper torn into strips.
-
Flour & water
-
Scissors, paint brushes & masking tape
-
Your choice of paint and primer/sealer
Step by step instructions
1. Blow up a balloon, tie the end into a knot, and set it down in a small cup. The cup will prevent the balloon from rolling away while you work.
2. Mix one part flour with two parts water in a small bowl. This will be your papier-mâché glue, you want a runny consistency.
3. Tear newspaper into small strips. Newspaper works best, but you can also use tissue paper. Opt not to cut the paper as the ragged edges will help the paper seal together and give you a smoother finish.
(You can also use both newspaper and tissue paper. When you do multiple layers, you will be able to see which one you are working on)
4. Dip a paper strip into the glue, and place it onto the balloon. Drag the strip across the edge of the bowl as you pull it out, this will remove any excess glue. Place it down near the top of the balloon. Use your fingers or a paintbrush to smooth the paper down.
5. Continue applying the strips until the balloon is completely covered. Overlap the strips slightly as you work from one end of the balloon to the other. Don't cover the tail, as this is how you'll remove the balloon at the end.
6. Apply a second layer of paper. You don't have to dip these strips of paper into the glue. Simply stick them to the wet paper that's already on the balloon. Apply additional glue to any areas that feel too dry.
Two layers is ideal for eggs that you want to cut open. If you want a sturdier egg, apply a third layer. You may have to use some extra glue for this layer.
7. Hang the balloon up to dry. Use pegs and string to hang and dry. Wait for them to dry completely before moving on. Depending on how many layers you do, this part of the process may take up to 2 or 3 days.
8. Pop and remove the balloon. Once the egg is completely dry, gently tug the balloon tail up so that you expose a bit of the balloon. Pierce it with a pin or pair of scissors and wait for the balloon to deflate. Once it is completely deflated, pull it out and discard it.
9. Time paint and decorate! To make the paint really stand out, coat the entire egg using white primer and let it dry. Once you have your white base, you can paint your egg any colour you want!
10. Consider giving the eggs a final coating of gloss. Once all the paint has dried, spray or paint the eggs with a glossy or matt sealer. This will help make them more durable.
You can cut the egg in half using jagged, zigzag lines so that it resembles a cracked open egg.
Now that you have beautiful handmade Easter props (and have pleased the kids with a fun craft activity!) you can style the house/backyard and cubby with your creations!
For more Easter inspiration and ideas on how to create a magical long weekend, check out our other blog posts!
Wanting to suprise the kids with the promise of an extra Easter Treat!?
Check out our Easter Special.